Showing posts with label tutorial. Show all posts

12.09.2012

DIY handmade Christmas ornament: Christmas Tree!

For last week's Modern Quilt Guild meeting, we had a handmade Christmas ornament exchange.  I put mine together at the last minute in about 20 minutes the night before with scraps from my sewing stash.  It's a double sided scrappy Christmas tree! It was a super easy project, and I'm happy with the way it turned out... here are some basic steps (sorry, no photos - I was in a rush to get it finished!):


1. Cut out triangles for the tree.  I cut out 3 green triangles for the front, and 3 orange triangles for the back.  I just eyeballed the green set, and then made the orange set match in size.  I also cut out two little brown scraps for the tree trunk.

 2. Arrange the triangles and tree trunk of each side and fuse it all at the same time to fusible fleece.

3.  With the wrong sides together, zig zag around each triangle and the tree trunk.  I also inserted the ends of a bit of ribbon I had lying around into the top point of the tree.

Voila! 

9.16.2012

tutorial: DIY fabric marker board / white board

Today I have an easy-peasy marker board tutorial to share!  This idea came about after I decided that I wanted a marker board in my office.  Well, a quick trip to Staples showed me that this was pretty much my only option (especially in my price range, which was like $3). I went ahead and took the liberty of adding my own flourishes to this photo.


This option just wasn't going to fly, and considering the previously mentioned budget, I decided upon an alternative.  Surprise!  This literally did cost me $3, and looks so SO much nicer than other commercially available marker boards.  In fact, I could just use it as artwork if for some reason I don't have anything to do.  Which is never.  So I'll keep it as a marker board.

I decided to use a piece of fabric that I designed and had printed at Spoonflower, so it's nice to display it in my creative space!


Supplies:
- thrift store or purchased frame (mine is a 12"x16" frame)
- fabric scrap
- spray mount adhesive (I've used Scotch and 3M brands with equal success)
- rotary cutter, ruler, and cutting mat (or scissors)


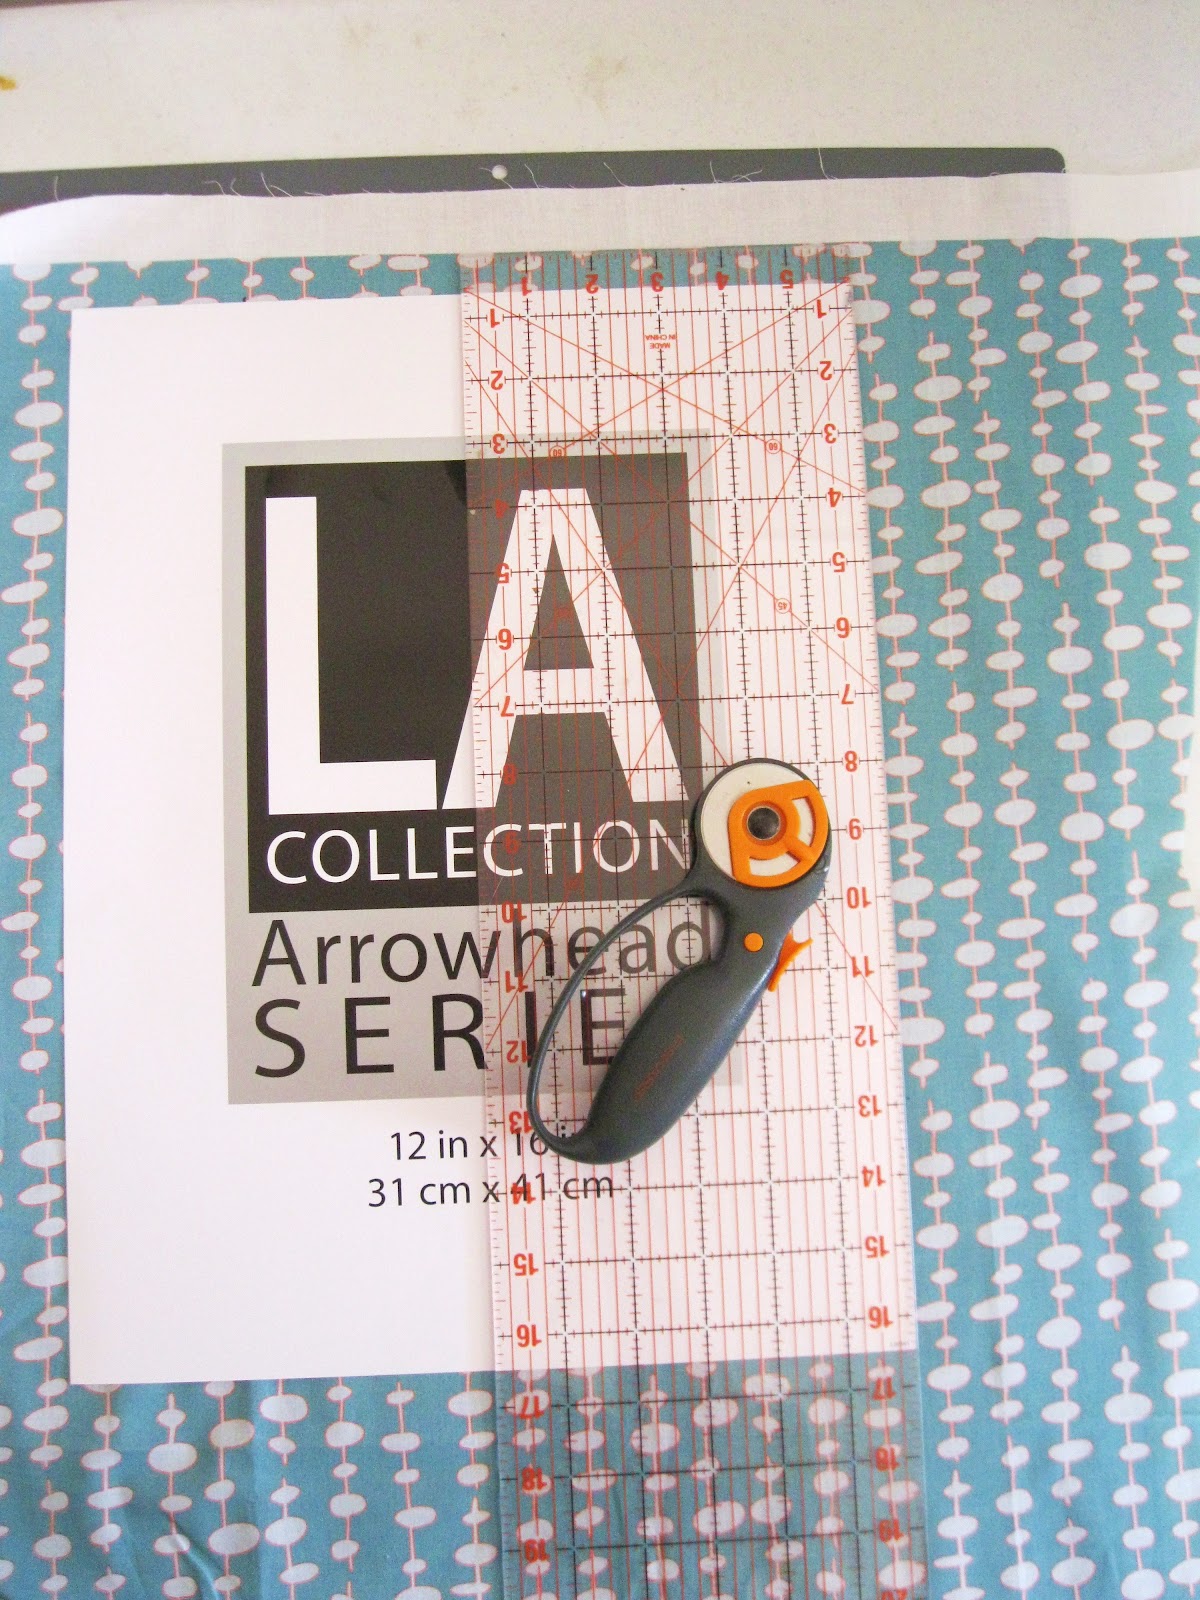
1. First, I pressed the fabric.  Then I removed the backing of the frame and used the paper insert as a guide so I knew what size fabric piece I should cut.  My rotary cutter and mat were nice tools to have, but obviously this could be done with regular fabric scissors.


 2. Spray the adhesive onto the particle board backer that comes with the frame.  Double sided tape could also work nicely if you don't have spray mount on hand.


3.  Pop the backer into the frame and hang on your wall!  I used those velcro 3M strips on my frame so that the frame doesn't wobble around while I'm trying to write on it.  Voila!  Done!


5.23.2012

DIY Painted Dropcloth Drapes: Part 1

A little bit of background first, before I dive into the DIY tutorial to make your own painted drapes:

My husband and I just moved into a rental house in Albuquerque last week.  The house has so much light and beautiful hardwood floors.  BUT.... the walls are blue, not my choice for a living room.  Actually, every single room in the house minus one (my sewing room, I get a SEWING ROOM!) is painted some shade of blue or greenish-blue.  Alas, this too shall pass.  But not when we're living here, because as I said, it's a rental.  Anyway.  The window treatments in the living room were vertical metal shades.  Gross, it's kind of like a dorm room.  Those have to go.  The huge catch is that the house was built in the 1940s and it's lath and plaster wall construction, which means that I can't drill any holes in the walls.  Well, I could, but then we'd be out our security deposit. So here's the challenge:  cute, functional, inexpensive window treatments that I can't actually use any hardware to connect to the wall.  Hmm.
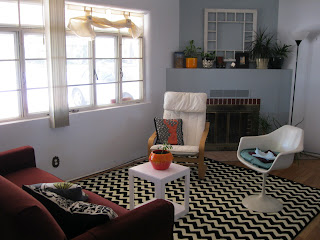
Living room now, with the metal shades still up and one window outfitted with my homemade "Roman" shades. (Don't mind the lack of coffee table... this room is still a work in progress...).
So I began to brainstorm:  tension rods wouldn't work, the width of the window is 104".  Also, the wall is kinda beveled in towards the window frames, so I don't think it would grip well anyway.  I tried to imagine rigging something on top of the current nasty metal shade structure, but then it would look like I mounted something on top of a nasty metal shade structure.

I had a breakthrough when I realized that the window frames are metal!  Magnetic curtain rods!  So, I bought four of those babies from Big Lots to span the window.  It's actually two window frames right next to each other, and I want them to look like two separate windows.  I bought some muslin at JoAnn's with a 40% off coupon - score!  I wanted Roman-esque shades without actually needing to purchase any extra hardware (did I mention I'm on a super tight budget??).  So I fashioned a couple of tabs so that when the shade is up, the tabs just loop around the fabric and button at the top.  See? This whole shade fix was about $30, mostly because of the magnetic rods.

Now onto the star of the show, three drapery panels.  I love damask patterns, but sometimes it's just too formal.  I wanted a casual, youthful take on damask, but all of the fabrics I liked were just way too expensive.  So, I purchased two 6'x9' dropcloths at Lowe's and cut them in half lengthwise and ended up with four panels.  I only need three for my project, so now I have an extra piece that I can use to make pillow covers or maybe a shade for my dining room window. 

Now, these panels can't be mounted to the wall with curtain rods or hardware, so I'll put several command hooks on the wall close to the ceiling and sew little tabs onto the back top of each panel.  They'll be stationary panels and just for aesthetics.

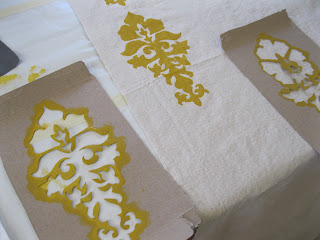
There are plenty of really cool, large scale stencils out there that I could have used, but again, I didn't want to spend $50 on one.  (Olive Leaf Stencils has some really cool ikat stencils). But I do have an Exacto knife and an empty cereal box, so I created my own stencil!  I found an image in a textile design book, scanned it and enlarged it to the correct size and printed it on regular printer paper.  I taped the paper to my cereal box and cut it out with my Exacto knife. It felt like sophomore year in design school all over again.  The design that I chose actually has two components, so I have two stencils. 
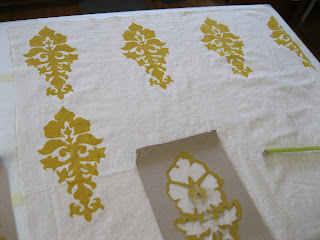


Now I'm in the process of stenciling them to the drop cloths.  I taped wax paper on the whole surface of my craft table to protect it, and started working.  Before I started to paint, I had dimensions for spacing out the stencils planned out, so all I had to do was measure and start painting.  I used a stubby little foam stencil brush and used acrylic craft paint mixed with textile medium.  The textile medium turns the paint into fabric paint, and makes it less stiff when it dries and machine washable.  Nifty, huh?

Now, this is going to take me forever, but we'll see how it goes!

6.01.2011

Tutorial: How to Make an Adjustable Strap

Step-by-step instructions to create an adjustable strap for your handbag.  Use this technique for almost any bag that has a single strap – especially the Pleated Messenger bag!


1. Determine strap length.  Decide how long you want your strap to be by draping a measuring tape across your body and noting where you would like the bag to hang when the strap is fully extended. Add 8” to this length. Sew the strap according to pattern directions.


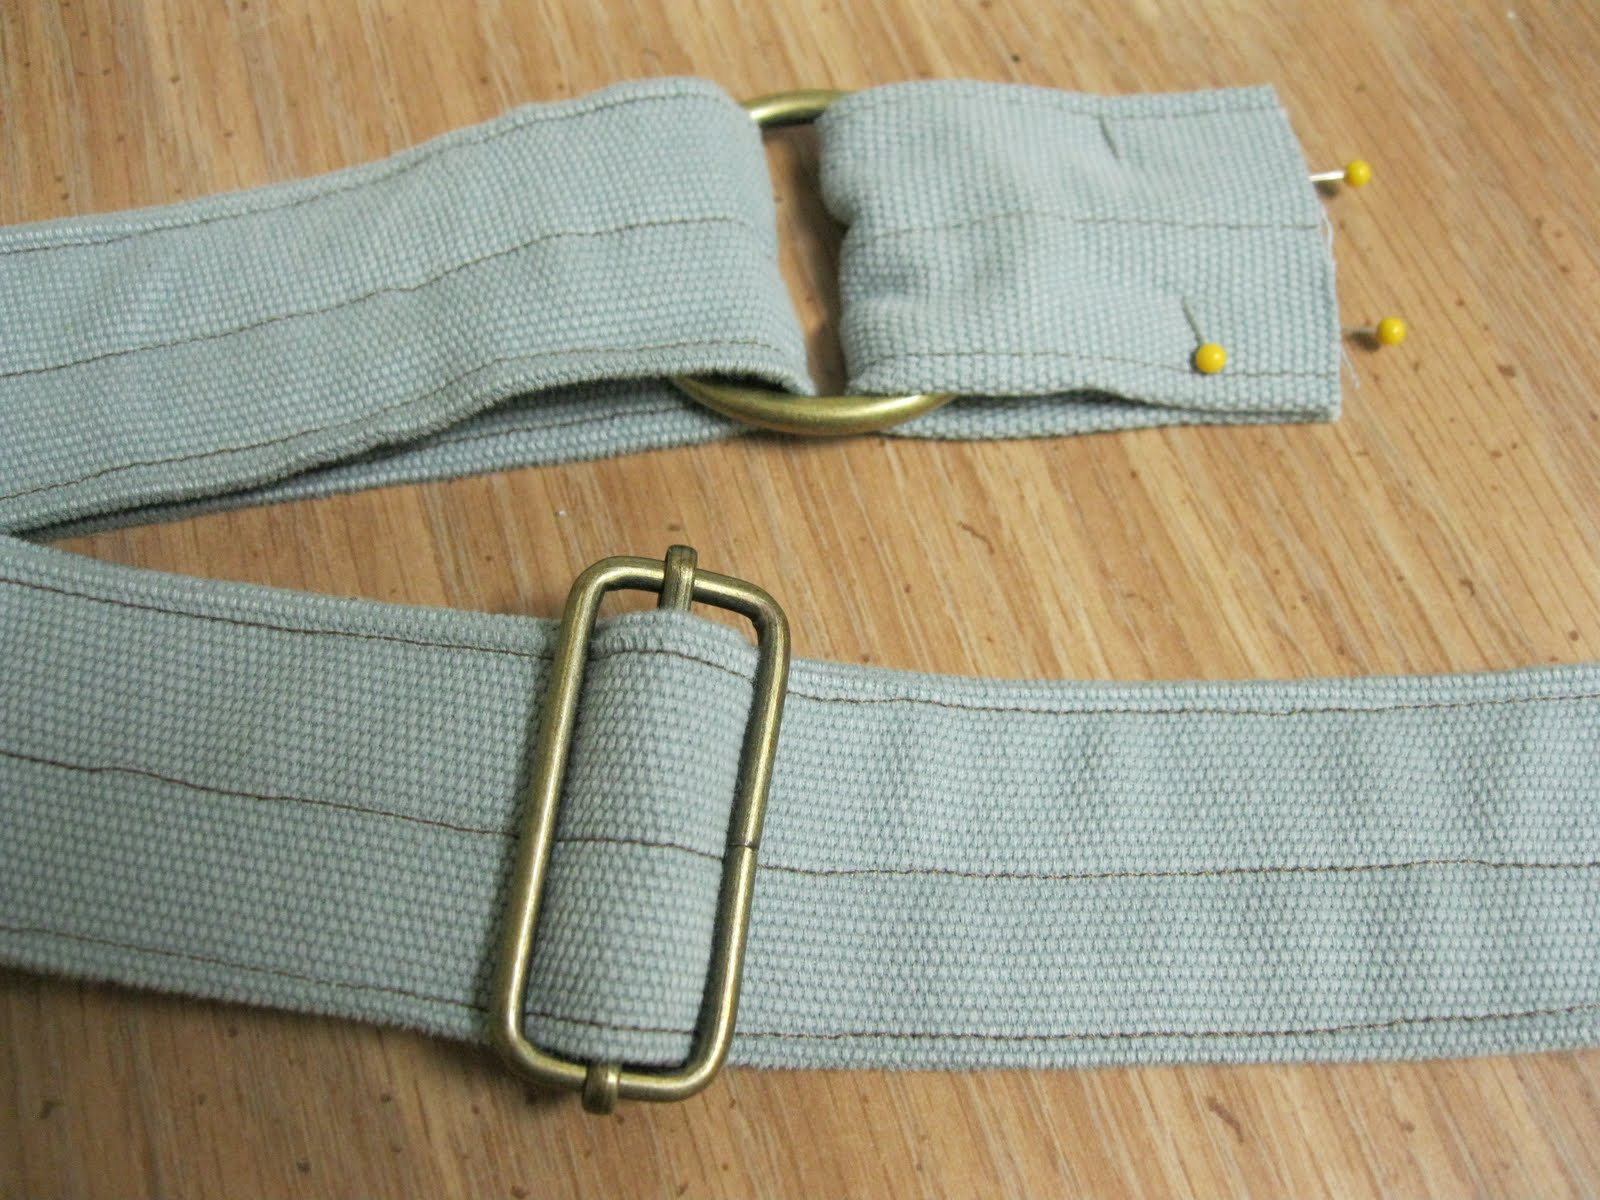
    2. Attach O-Ring. Then, cut off 4” from the strap you just sewed.  Fold this section in half widthwise and slide on the o-ring.  Baste or pin the cut ends together.

3.   Attach Slider. Next, attach the slider to the remaining portion of the strap. Loop the strap over the center bar of the slider, folding it over approximately 2”. Stitch in place.


4.  Put it All Together. Now feed the long part of the strap through the o-ring and thread it through the slider piece.  Now you have one continuous strap.  Double check the length of the strap by draping it across your body where you would like the bag to hang and adjust the length as necessary. Continue following the pattern directions to attach the strap to the bag.


{ visit www.jengiddens.com & click on tutorials to find a downloadable PDF of this tutorial! }

5.31.2011

Tutorial: How to Sew an Infinity Scarf


I love the idea of creating a spring or fall scarf that is lightweight -- just substantial enough to keep off the chill, but not so heavy so that it can be worn in the in between days of the year.  I know I LIVE in scarves in the wintertime, and this infinity scarf means I can extend my scarf wearing days even more!

The material I chose was about 54" wide, so I simply purchased two 1/3 yard cuts of fabric.  If you choose to use quilting fabric that is about 44" inches wide or so, I would purchase the length of fabric needed rather than the wide, as I have done.

The first time I made this scarf, even with trial and error, ripping out part of seam and figuring out how one end of the scarf linked to the other end, it took me less than 30 minutes!  This could literally be a 15 minute project for a super cute accessory!

Materials:
two rectangles of contrasting lightweight fabric, about 12" x 54"
           (I used voile prints from Anna Maria Horner's Little Folks collection)
Pins
Coordinating or contrasting spool of thread
Iron

Step 1:
With right sides together, sew the long sides of the fabric together with a 1/2" seam allowance as shown.


Step 2: 
Turn right side out and press.  On one end, turn under the raw edges to the inside about 1" and press. Leave the other end as is.


Step 3:
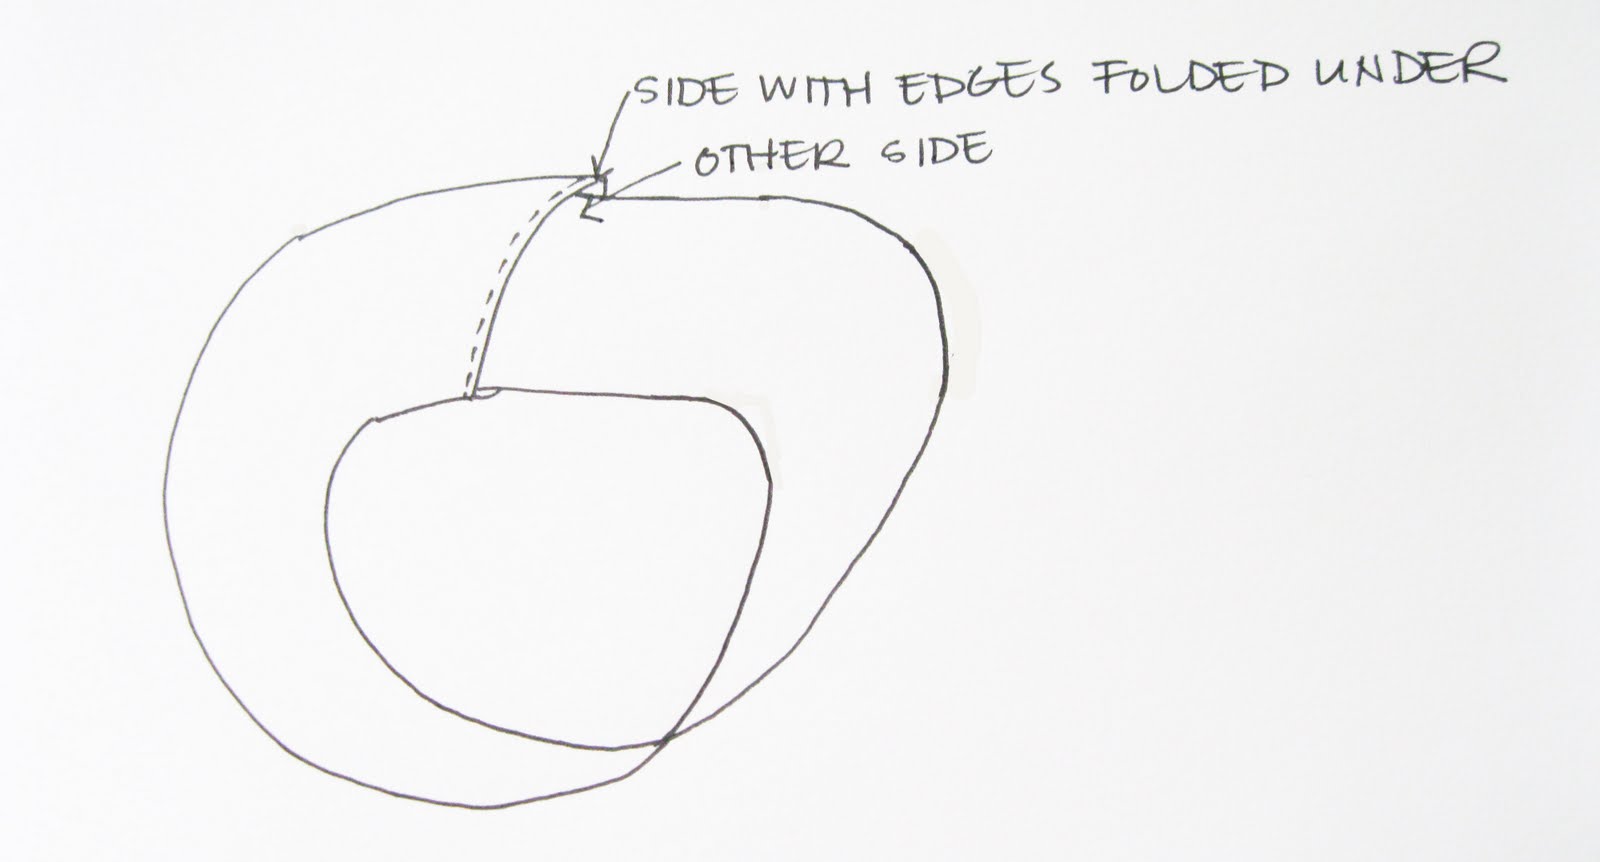
Twist the scarf once and insert the end with the raw edges about one inch inside the end with the folded and pressed edge.  Pin.  Twisting the scarf once should mean that when the ends of the scarf are joined together, the contrasting fabrics butt up against each other.


Step 4:
About 1/2" from the folded edge, sew a straight seam across the width of the scarf, backstitching on each end. 

VOILA!  A finished scarf!  You could topstitch along the edge of the whole scarf if you would like it to lay a bit flatter and look more structured.  I prefer the scarf without the topstitching, because it is a little bit looser and billows a bit more freely.


{ visit www.jengiddens.com & click on tutorials for a PDF version of this tutorial! }

1.12.2010

tutorial: how to make cloth napkins with mitered corners

Cloth napkins are a great way to reduce your consumption of disposables in the kitchen.  Cloth napkins are oh-so-easy... you can have a set of napkins made in no time!

Although cloth napkins can easily be made by simply turning under the edges on each side, a mitered corner will give you a cleaner, more professional look.  This tutorial will show you how to create mitered corners on your napkins.

1.  Cut your fabric into squares of your chosen size (12" or 14" square napkins are common, bump it up to 16" if you'd like them to be oversized).  Be sure to cut along the grain of the fabric (in other words, align your squares so that 2 sides are parallel to the selvage edges of the fabric).

2.  Press each edge under 1/4"

3.  Press each edge under another 1/4".  Your fabric will look like the drawing below.  Note where I have drawn a trim line.  Cut the fabric corners along the trim line.  This will reduce the bulk of the corners and make the fabric lay nicely.
4.  Now press the cut corners under 1/4".
5.  Fold along your second set of press lines.  The corners should now be mitered.  Stitch around each napkin close to the hem line.