6.20.2011

weekend in the prairie

Chris and I went northeast to the Pawnee National Grasslands for our first getaway together since moving to Denver.  It's funny to me that we went east to the plains instead of west to the mountains, but the Rockies had tons of snow this weekend, which leaves camping areas sparse and crowded this early in the summer.

The grassland was beautiful.... I had never quite ventured into this sort of terrain, and the beauty of it and life that it held caught me off guard.   Did you know that grasslands remove more carbon dioxide from the air than rainforests?


We hiked to the Pawnee Buttes, then drove dirt roads through the grasslands to find the perfect camping spot, investigating windmills and wildlife in between.


Arkansas family vacation

Not the typical family vacation spot, but Arkansas was a pleasant surprise.  It was hot but not unbearable, and the rivers and lakes were just perfect for recreating.  We swam, floated, and boated in several bodies of water during our stay.  I traveled there to meet up with my two older brothers and their wives, 3 little boy nephews, and my mom and dad.  Unfortunately, Chris wasn't able to be there because of work obligations... he sure missed out!

Here are a couple of highlights:

Horseback riding with the women... here I am with Buddy :)

 
Lazy river floating outside our back door.

A heron or crane during our boating expedition on Lake Ouichita.

Jumping off the boat into amazing warm water!

Petting zoo in Hot Springs... we got to see the alligators eat their lunch of raw chicken!


The goats sure liked my shorts.


We found teeny tiny little frogs down by the river on one of the last days... they couldn't have been longer than 1/4 inch!

Lake Ouichita.

I held a baby alligator!

So did Garrett, but he was not as amused.

Goats jumping all over me!

Toni and I admiring the view...

The river outside the back door.

The twins, Owen and Eli, throwing rocks into the river.

Eli doing a funny little dance after he threw .the rocks into the water

Owen choosing his next rock to throw.

I'm totally embarrassed by my ghost white legs, but Garrett is cute enough to make me want to include this photo.

Driving the boat!

The fam, minus Chris.

6.01.2011

reflections on Market...


Brace yourself for a wordy post!  I've been full of photos lately, but I've had a lot of time to mull over a few things that I would like to share... (but I won't judge if you can't deal with lack of visual stimulation! Just skip to the end of this post...).

I've had a few weeks to decompress and process all of the experience of the Spring International Quilt Market, which just happened a few weeks ago in Salt Lake City.  There were so many emotions, stimulations, people to meet, things to see, ideas to process after that crazy weekend that I'm just now beginning to articulate what I learned from Market and how it will impact my business in the future.

The most immediate impact that all of this will mean to many of you is that I have decided to no longer offer PDF patterns for sale on Etsy.  I am doing this for a variety of reasons.  Care to hear?

1. I want to support the local quilt shop.  When people know that they can purchase PDF patterns online for a few dollars less than in shops, it makes them more inclined to shop online instead of in their local shop.  Although this is good news for me, since my cut of the profit is higher, it isn't in line with my "shop local" philosophy.

2. PDF patterns are tricky, because they are easier to forward to friends via email.  This isn't great news for me, since it means that my patterns could be passed around and I wouldn't be compensated for all of the time and creativity it takes to develop a sewing pattern.

3. In the future, I plan to offer limited edition PDF patterns on Etsy, but they will be smaller, easier projects and will not compete with the paper patterns available in the shop.

4. I'm not sure if this should be a number, but I am still offering the printed patterns for sale in my shop, and at the same retail price that I suggest to quilt shops. If you have a quilt shop in your area that sells my pattern, by all means, purchase it there!  But for those of you who have no other way to get my patterns, come on over to my shop to purchase.


On that note, as many of you may know, I redesigned the look of my patterns just in time for Spring Market, and had them professionally printed and assembled.  (Goodbye folding and assembling patterns myself at the kitchen table -- YIPPEE!!).  The professional printing has caused me to reevaluate the price of my patterns, so you may have noticed a price increase.  This new price reflects the going rate for purse patterns these days, and is the price I need to maintain in order for designing patterns to pay off financially.  I'm as thrifty as the next person, but believe me, the difference in printing and the quality of the pattern makes the price totally worth it.

Here's a peak into the redesigned patterns:

Pleated Messenger  Sewing Pattern
pattern cover

Pleated Messenger  Sewing Pattern
pattern back

Pleated Messenger  Sewing Pattern
image of the pocket tote and classic messenger patterns

Pleated Messenger  Sewing Pattern
inside the pocket tote pattern

Tutorial: How to Make an Adjustable Strap

Step-by-step instructions to create an adjustable strap for your handbag.  Use this technique for almost any bag that has a single strap – especially the Pleated Messenger bag!


1. Determine strap length.  Decide how long you want your strap to be by draping a measuring tape across your body and noting where you would like the bag to hang when the strap is fully extended. Add 8” to this length. Sew the strap according to pattern directions.


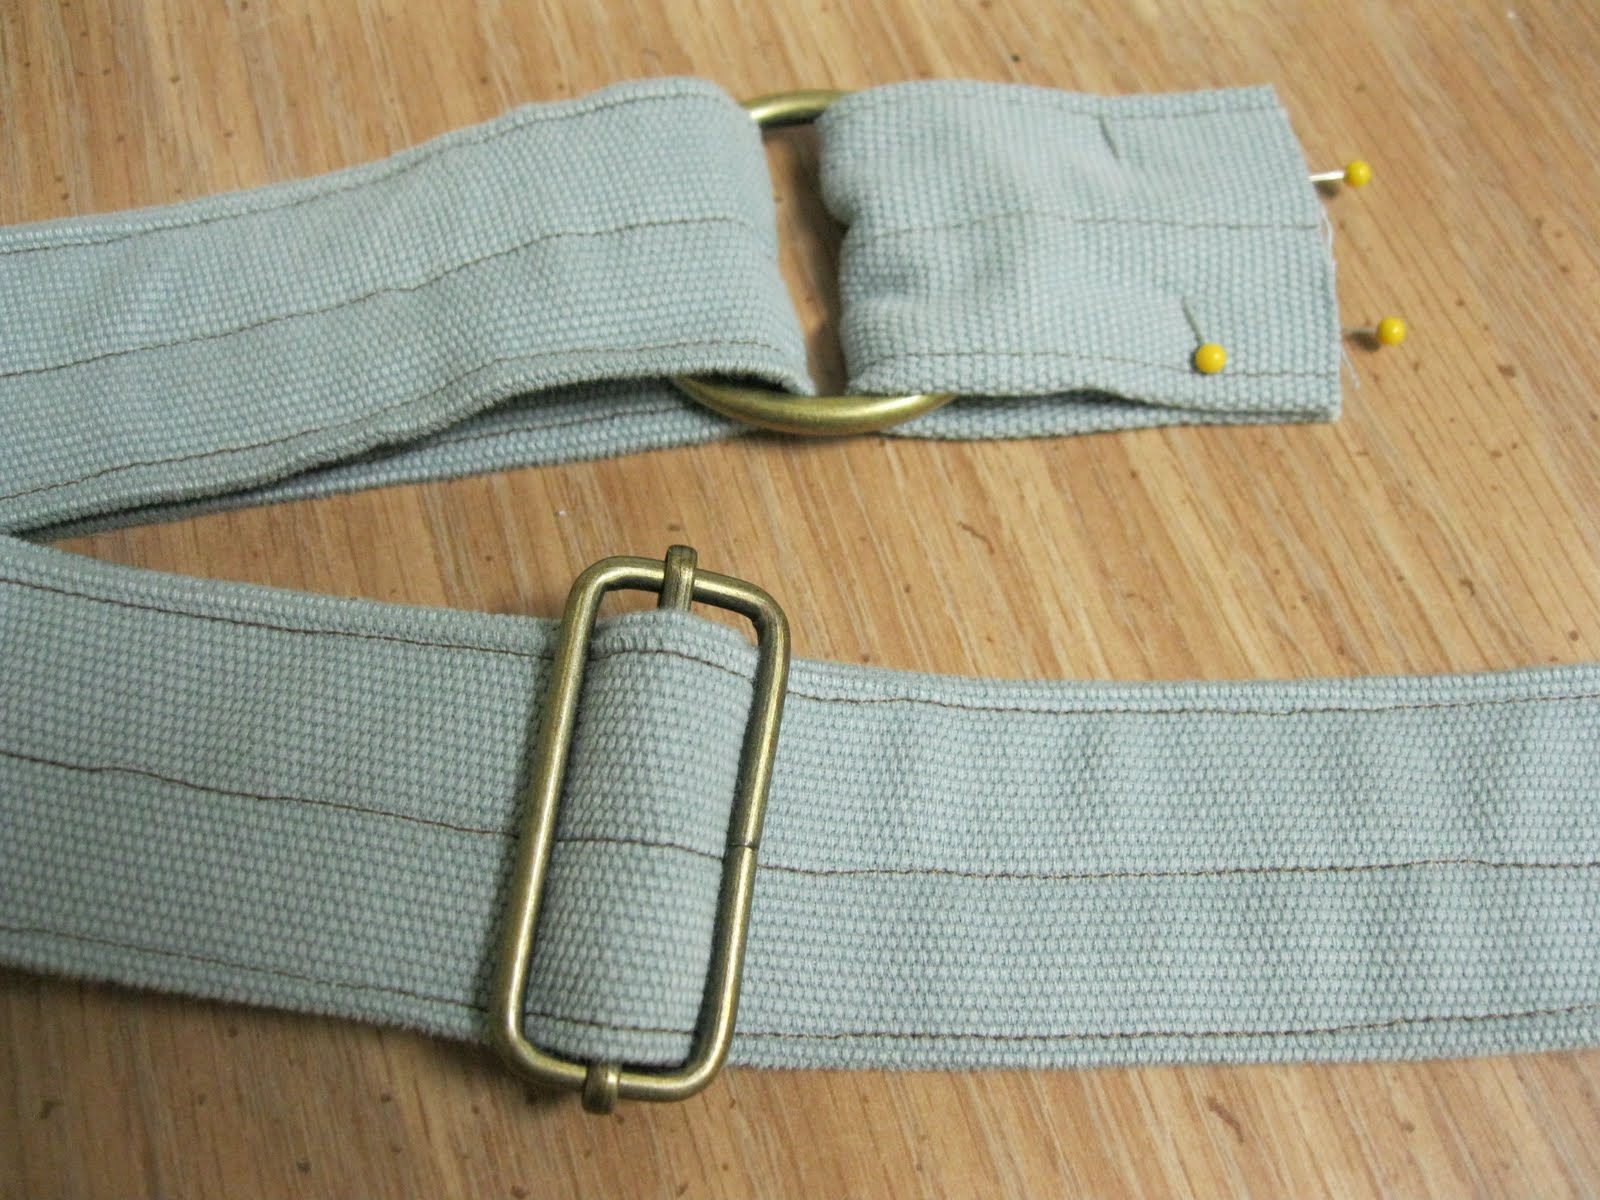
    2. Attach O-Ring. Then, cut off 4” from the strap you just sewed.  Fold this section in half widthwise and slide on the o-ring.  Baste or pin the cut ends together.

3.   Attach Slider. Next, attach the slider to the remaining portion of the strap. Loop the strap over the center bar of the slider, folding it over approximately 2”. Stitch in place.


4.  Put it All Together. Now feed the long part of the strap through the o-ring and thread it through the slider piece.  Now you have one continuous strap.  Double check the length of the strap by draping it across your body where you would like the bag to hang and adjust the length as necessary. Continue following the pattern directions to attach the strap to the bag.


{ visit www.jengiddens.com & click on tutorials to find a downloadable PDF of this tutorial! }

5.31.2011

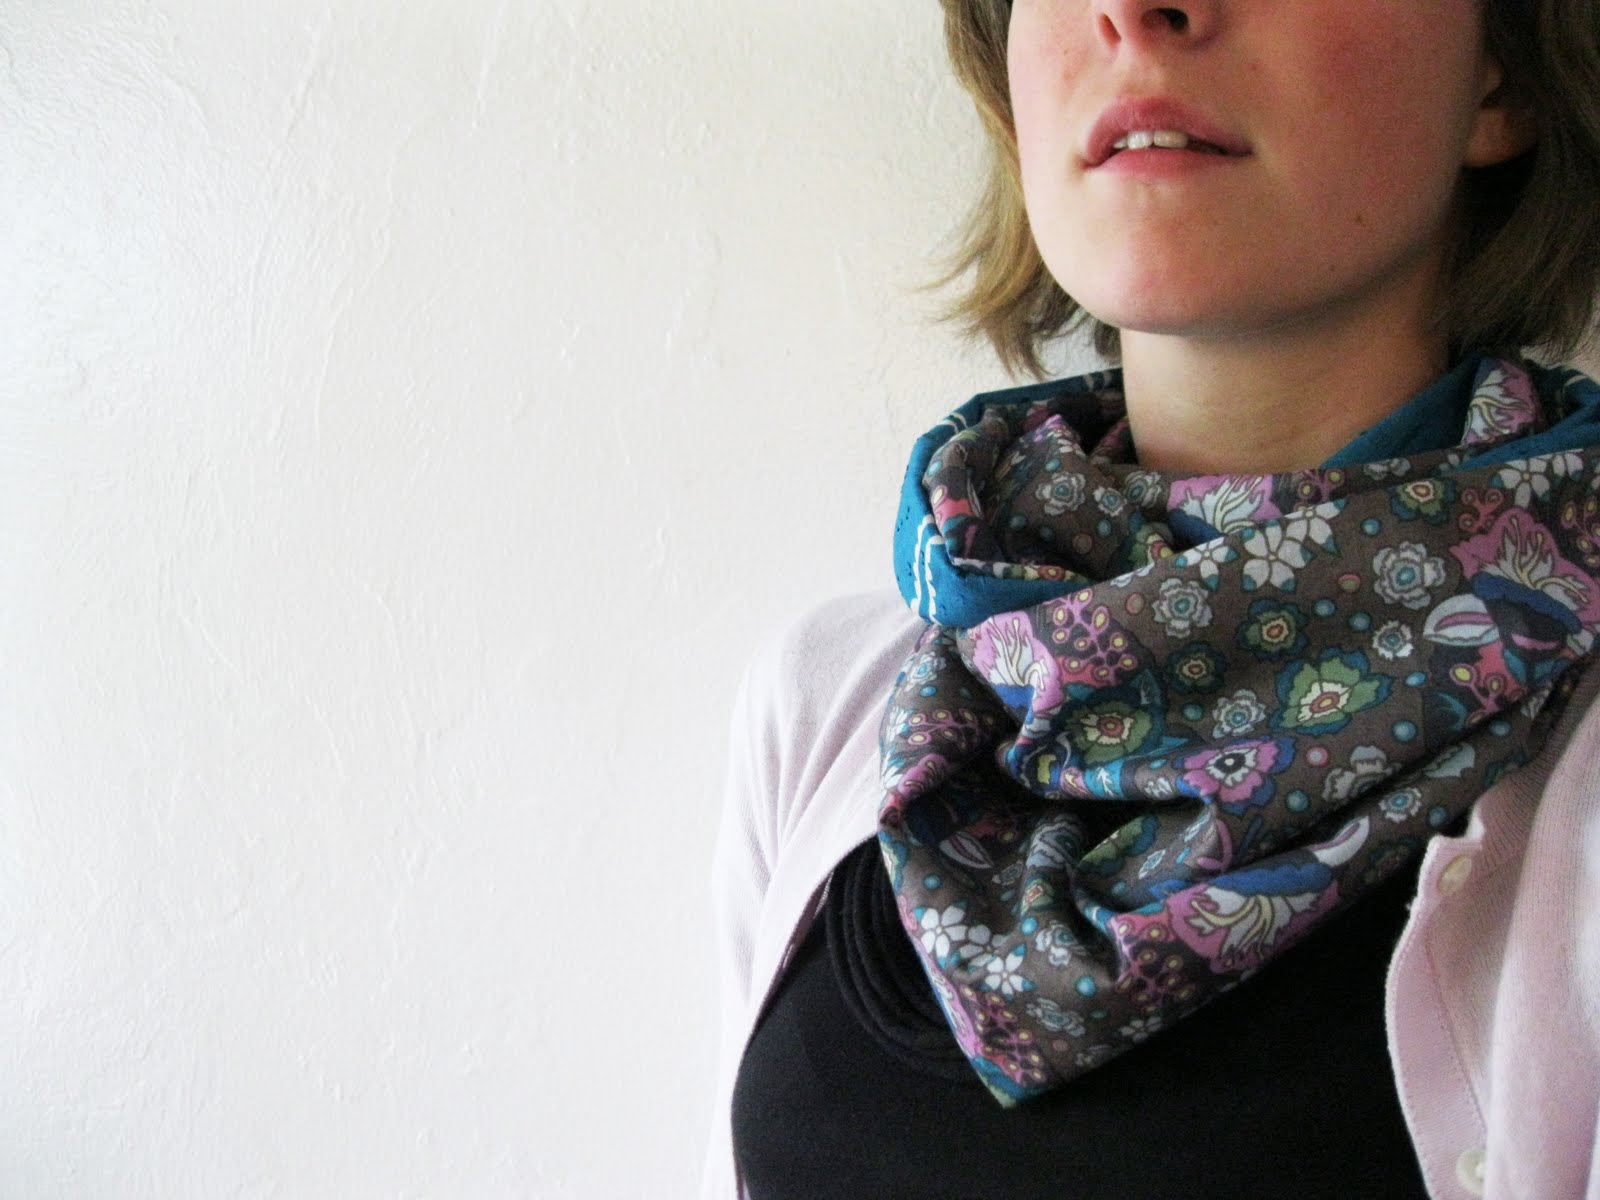
Tutorial: How to Sew an Infinity Scarf


I love the idea of creating a spring or fall scarf that is lightweight -- just substantial enough to keep off the chill, but not so heavy so that it can be worn in the in between days of the year.  I know I LIVE in scarves in the wintertime, and this infinity scarf means I can extend my scarf wearing days even more!

The material I chose was about 54" wide, so I simply purchased two 1/3 yard cuts of fabric.  If you choose to use quilting fabric that is about 44" inches wide or so, I would purchase the length of fabric needed rather than the wide, as I have done.

The first time I made this scarf, even with trial and error, ripping out part of seam and figuring out how one end of the scarf linked to the other end, it took me less than 30 minutes!  This could literally be a 15 minute project for a super cute accessory!

Materials:
two rectangles of contrasting lightweight fabric, about 12" x 54"
           (I used voile prints from Anna Maria Horner's Little Folks collection)
Pins
Coordinating or contrasting spool of thread
Iron

Step 1:
With right sides together, sew the long sides of the fabric together with a 1/2" seam allowance as shown.


Step 2: 
Turn right side out and press.  On one end, turn under the raw edges to the inside about 1" and press. Leave the other end as is.


Step 3:
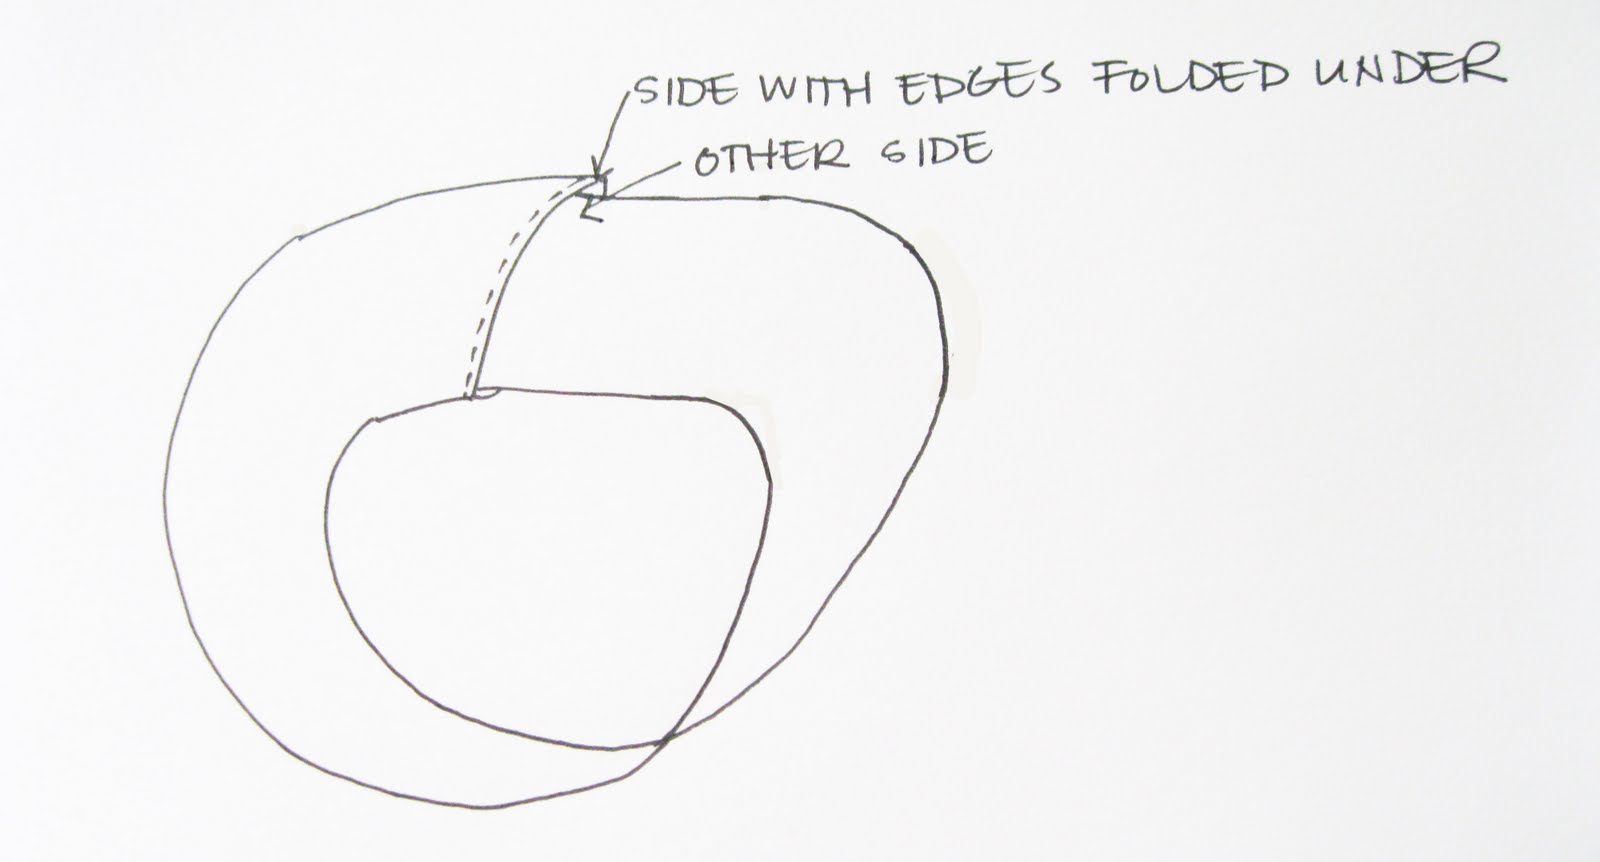
Twist the scarf once and insert the end with the raw edges about one inch inside the end with the folded and pressed edge.  Pin.  Twisting the scarf once should mean that when the ends of the scarf are joined together, the contrasting fabrics butt up against each other.


Step 4:
About 1/2" from the folded edge, sew a straight seam across the width of the scarf, backstitching on each end. 

VOILA!  A finished scarf!  You could topstitch along the edge of the whole scarf if you would like it to lay a bit flatter and look more structured.  I prefer the scarf without the topstitching, because it is a little bit looser and billows a bit more freely.


{ visit www.jengiddens.com & click on tutorials for a PDF version of this tutorial! }

5.26.2011

amazing installations!

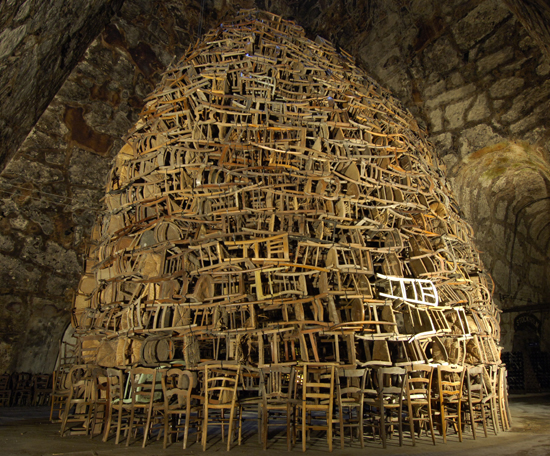
Tadashi Kawamata, how did I not know about you before?
Now I just need to find me 1,000 wooden chairs and a huge dome to pile them in...


5.25.2011

I'm on Facebook!

I've been on Facebook for a while now with my personal account, but I just took the step to put up a business page for my sewing pattern business!

Find it here!